Scrapbook Generation's Free March Sketch
* you can download by clicking here
.jpg)
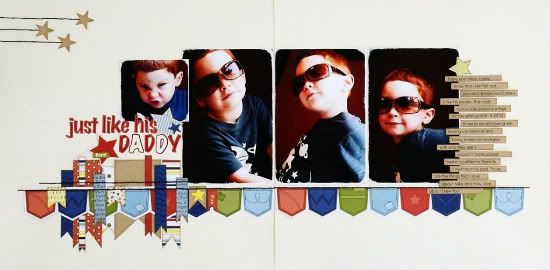
"One of a Kind Jackson"

Supplies - Cardstock: Bazzill; Patterned paper: Echo Park; Alphabets: Echo Park (one), October Afternoon (of a kind), and American Crafts (jackson); Star punch: EK Success; Brads: Doodlebug and unknown; Ink: Colorbox Fluid Chalk Ink; Embroidery floss: DMC
The biggest change on this layout was with the design/papers.
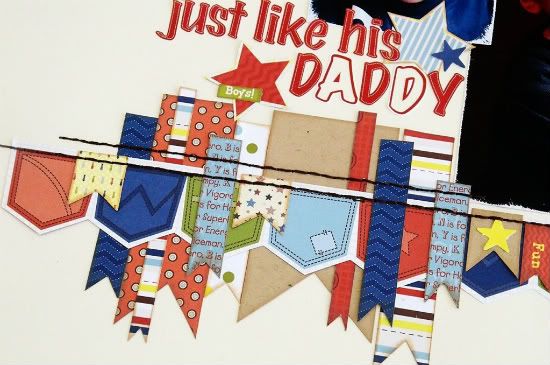
Variation #1 - I am in love with the look of banner/notched/(insert whatever you call them) strips. In love. You can take a plain strip and with just a simple snip you get a whole different look.
I followed the sketch as far as the width of the strips, the 4", but I cut an inch off the length to accommodate the notched ends. Another idea would have been to the leave the top edge of the strips straight and just cutting the bottom end.
Variation #2 - I wanted to add in some more colors and patterns so I add a few smaller strips in different sizes. They are kind of filling in for the striped strips on the sketch. One reason I like to use a stripe on my layouts is that stripes are great for tying all the colors on the layout together.
Variation #3 - I used a 6 x 4" photo in place of the two 3 x 3" photos on the left page. There is only a 1" difference so I didn't have to make any major adjustments for the photo to fit. Using a larger photo in place of a few smaller ones is always a great way to adjust a sketch to fit what you want to use. Most of the time it only requires a few small adjustments. In my case, I just moved the top photo up a little so that the two photos together had pretty much the same spacing from the bottom of the bottom photo to the bottom of the layout and from the top of the top photo to the top of the layout. (Hopefully I didn't confuse you with that one!)
Variation #4 - I didn't add the banner across the page. Part of this had to do with the larger photo I mentioned in variation #3. There just wasn't a lot of room left for the banner. If I would have had a picture that had some open, empty space at the top I could have gotten away with still using the banner and overlapping it onto the picture. Since Jackson's head is all the way to the top of the photo I couldn't do that without covering him up. I wasn't too worried about it though since the background banner strips added so much more interest to the layout.
Variation #5 - I used a larger title than the sketch suggests. This is one of those areas that I don't worry about following the sketch exactly. A title is always an easy way to add a unique look to each layout and very rarely does the title I want to use or make fit the actual title on the sketch.

Variation #5 - I used much smaller embellishments than suggested on the sketch. Again, this is an area that I usually don't follow often. I use the sketch in areas of title and embellishment as more of a suggestion of where those elements should go, not exactly what they should look like.

I used small stars accented with brads for my embellishments. The title was long and had so many colors and textures that I didn't feel like I needed a large embellishment. I thought simple was the way to go.
Check this out!
On Sketch Week, Day 1 there was a comment linking to a wonderful (and very clever) use of the sketch this week that I really wanted you all to see.
Ruth at scrapmachine.com tried out a little experiment and used the sketch from this week for her Project Life layout. And I don't mean like a normal 12 x 24" layout. She used the sketch and made it all fit into the divided Project Life page protectors. You can check it by clicking here and reading about where she got the idea and how her experiment went.
It think it might be kind of fun to start sharing some of the layouts you all do based one the Sketch Week sketches. If you create a layout based on the sketch from that week leave a link in the comments and then on Monday I'll post all the links so everyone can go check them out.
.jpg)


.jpg)