Wednesday, July 28, 2010

CHA

I hope you weren't thinking that I was abandoning my blog. What a whirlwind of craziness the last few weeks have been.

Doing something new is always a learning experience and our trip to CHA has definitely been just that.

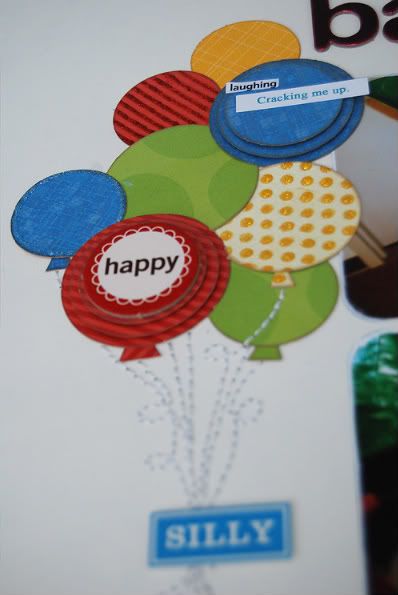
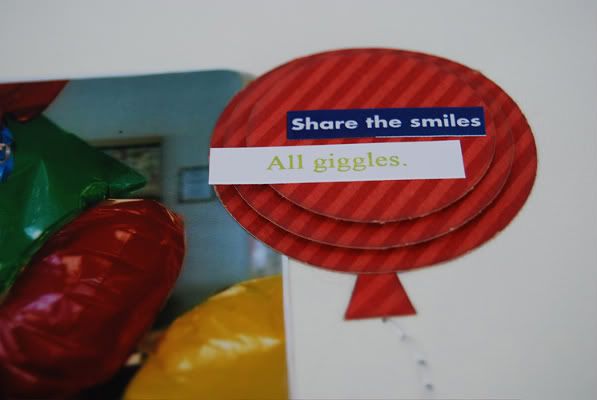
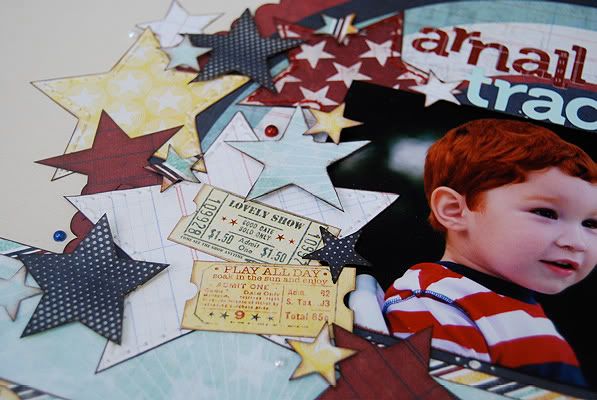
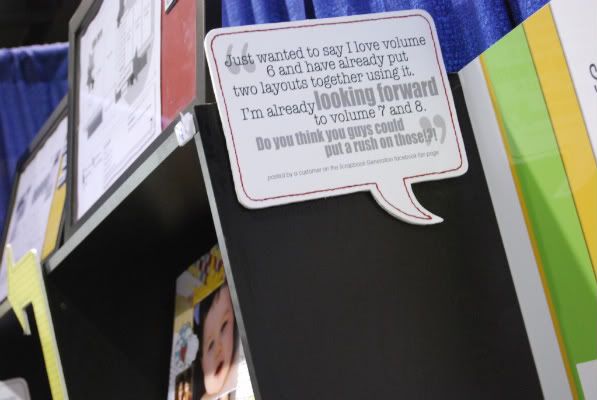
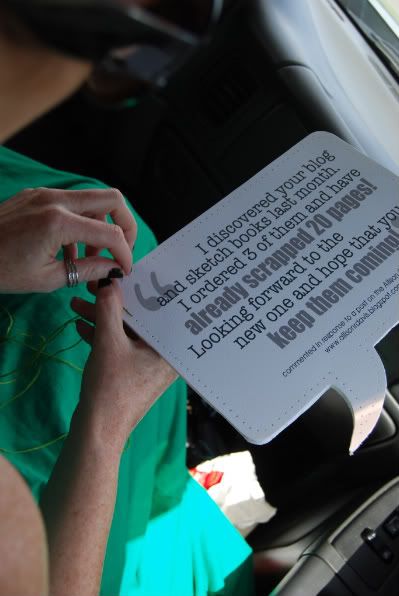
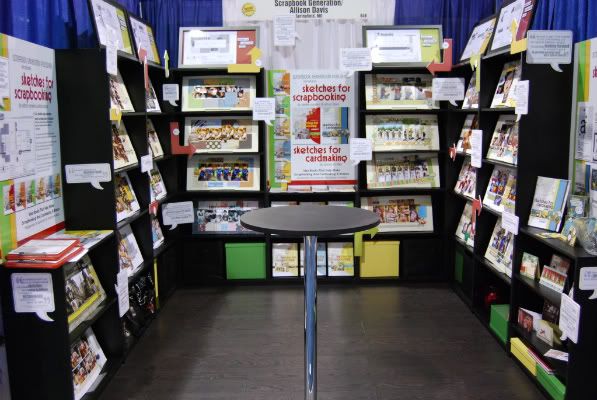
I have learned that no matter what I will never get tired of hand stitching. One of the decorative touches in our booth is quote bubbles with some of the great things that people all over have said about our books. I, of course, thought it would be a great idea to add hand stitching around them.


Brilliant idea in theory, but maybe not the most well thought out. I stitched almost the whole drive to Chicago (about 9 hours),


pretty much the whole day of booth set up,
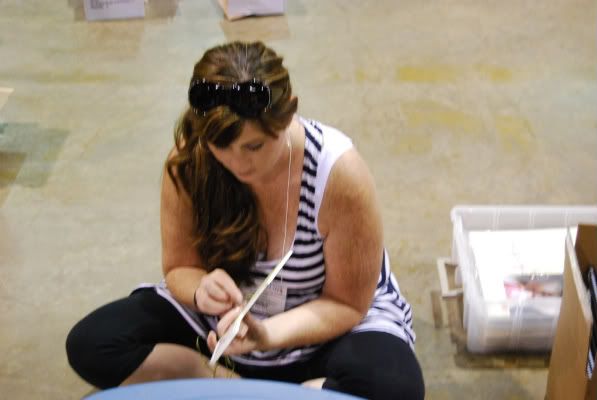


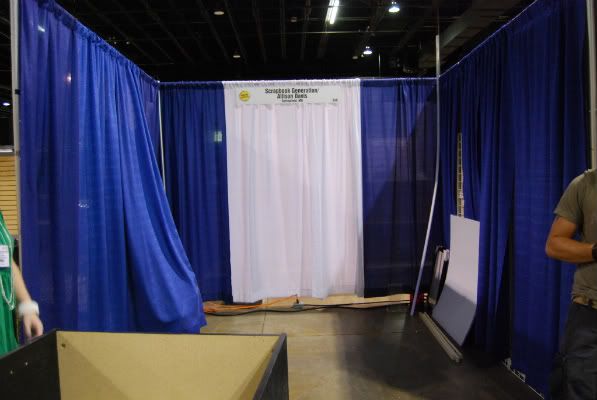
But another lesson learned was how much you could do with that small space.


I found out how fun it is to meet my blog readers.


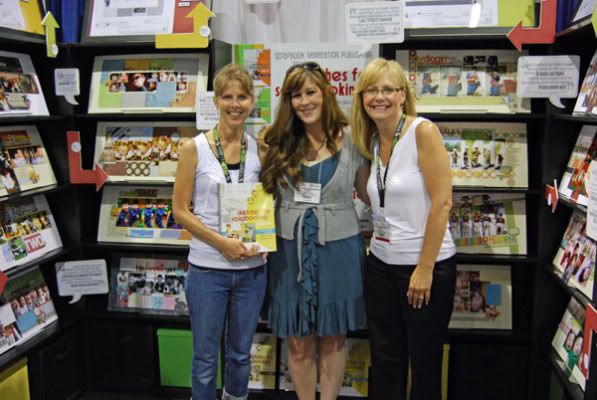
Carolyn and Joanne were fun to talk to and I'm so glad that I got a chance to chat with them. They also happened to be the owners of a store in Canada and were our first order of the show. It was such an exciting moment for us!

Another lesson learned was how great you all have been at spreading the news of our books to store owners.


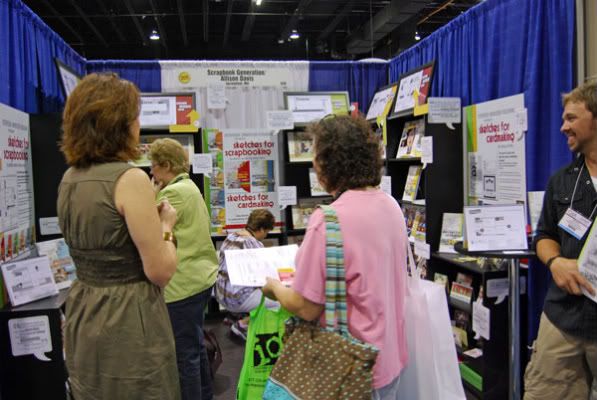
We had so many that said, "I have customers that want me to get these books." or "I keep hearing how great these books are from our customers." A big thank you to all of you for that one!

And the biggest lesson learned during CHA... no matter what shoes you wear your feet are going to hurt. After the first day, even with super comfy shoes on, my feet felt like they were on fire. I treated myself to a nice long, hot bath the second we got back to the hotel.

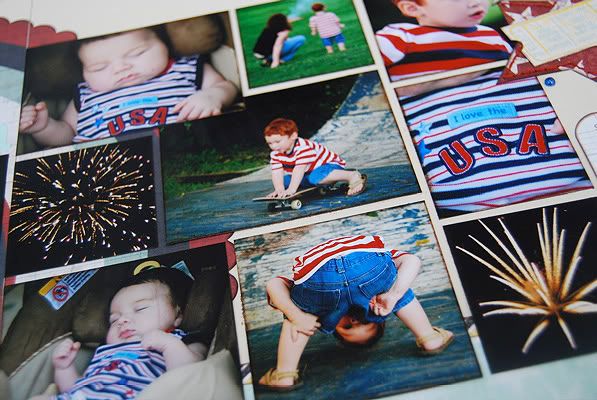
We've only got one more day of the show left before we head back home. It's been exciting to watch our books making their way into stores all over but let me tell you, I can't wait to see my boys. It has been near torture to miss them so much and to stand in a booth surrounded with pictures of them.

I'll hopefully be able to post more pictures later this week. :)

Monday, July 19, 2010

The Big Three-uh oh

On Sunday I said goodbye to my twenties.

I would say that in the last three years or so I thought my 30th birthday was going to be a rough one. This could be due to the fact that everyone I've been around hit the big three-oh and thought it was the end of the world. My husband for example went into a depressed slump for a good three days. Thank goodness it only took him a few days to realize that life hadn't ended.

I kept waiting for the depression to set in and counted down the days, wondering when I was going to freak out. I ,however, have been the polar opposite of depressed. The way I see it from here on out everyone has to take me seriously. This includes you Mom! I have officially hung up my young and stupid hat (which I wore pretty well) and traded it in for the older and wiser one. And I'm completely cool with that. Wait, am I allowed to say things like "cool" anymore?

All joking aside, what it all boils down to is pretty simple really.

I've never in my life been more sure of who I am, what I want out of my life, and what makes me happy. What could possibly be scary about that?

It's just a silly number. :)

On a different subject, I loved reading all the words of support about our CHA debut. It's going to be such a fun experience!

The winner of the giveaway is...

TerriB said...
They all look wonderful and I can't wait to order one! I love the new revisions.

You can email me at alidavis1919@hotmail.com with your shipping information and which volume of Sketches for Scrapbooking you would like. :)

Happy Monday! :)

Thursday, July 15, 2010

Sketches for Scrapbooking, CHA Sneak Peeks

I can't believe CHA is almost here! I'm anxious, nervous, excited, nervous, giddy, nervous...

I'm also excited to share with you all the new covers of our Sketches for Scrapbooking series of books and the Sketches for Cardmaking book. The newest volume, Volume 6 is already available but the other new cover editions won't be available until around August 15.


The covers weren't the only thing that got a face lift. Here's a look at the back cover.


I think my favorite part is a family photo (bottom left, you can only see a corner of it in this picture) of me, Karin, Stacey, Mom, Grandma, Drew, and Jackson. I'm just so proud of all our hard work and that we have managed to go this long without killing each other.

We also added a few updates to the inside as well.


Instead of the measurements and instructions being spread out around the sketch, they are now all together in a box at the bottom of the page. We also added how many photos are on the sketch (you can see it in the bottom right corner.) and the book is in order from least amount of photos to the most.

I think of all the covers Volume 4 is my favorite! I love the warm colors. Join me in my excitement by telling me which one is your favorite and you could win a copy of Sketches for Scrapbooking, (the new edition) Volume choice is all yours. :)

I'll announce the winner on Monday! Have a great weekend!

Tuesday, July 13, 2010

Another grid layout

A couple of weeks ago in my post here I talked about why I like using a grid pattern on my pages. On that layout the grid was made up of several photos which is a great to use for themes with lots of photos. It's perfect for including lots of detail shots of an event or a review type of layout. Like a "Day/Week/Month in the life of..." or a monthly layout with your favorite pictures of that month.

On this layout the whole design is a grid consisting of patterned papers, pictures, and the journaling.


I can't believe how little Drew looks in those pictures! Look at those chubby cheeks and his wildly curly hair! He's growing up way too fast for my liking!

One reason I love using this type of total design grid is that it is so easy to do and there are so many possibilities when it comes to what elements you want to use. For example, my layout consists of 3 x 3 blocks of patterned paper and photos with the journaling taking up a 3 x 6 block. You could easily use less patterned paper and more photos or less journaling and larger photos. Like maybe three 3 x 6 photos and the remaining space filled in with 3 x 3 patterned paper blocks. There are so many ways to switch it up.

Another fantastic thing about this grid design is that is can be adapted to fit any skill level or style. It's one of those no fail designs.

Now I really want to play around with this design and try different shapes instead of the squares! :)

Monday, July 12, 2010

Sketch Week - Wrap Up and Winners

Another Sketch Week has come to an end and the excitement for the next one can begin. Before I get into that here's a look at all the layouts from the week together.

The Sketch, from our DVD - Stretch Your Scrapbooking, that I used as the starting point for all five layouts.

"My Happy Place" - The layout that the sketch was based off of.


#1 - "More Than Sisters"


#2 - "Lovable, Sweet Chewy"


#3 - "The Word Nerd"


#4 - "Arnall Tradition"


#5 - "Balloon Boy"


The winner of the Sketches for Scrapbooking giveaway is...

Scrapthat said...
It looks great! I love the stars!! I NEED one of your sketch books I am itching to scrap my multi pic LOs!!

A big thank you to Pink Paislee for sponsoring July Sketch Week and donating an awesome giveaway. The winner of the Pink Paislee giveaway is...

debbie susee said...
Love all the stars! I have to do a 4th of July layout in the next week or so. Think I'll keep this sketch in mind when it comes up. :)

Congrats to both of you! You'll need to email me at alidavis1919@hotmail.com with your shipping info. :)

Now let's talk a little about August Sketch Week. Before I had scheduled Sketch Week as the second week of the month but I was confusing myself. For example, if the first day of the month fell on Thursday of one week did that mean that the next week was the second week or should it be the week after that since it would have technically been the second full week of the month. Anyway, from now on Sketch Week will always fall on the second Monday of the month.

Mark your calendars for August 9th! I'm not giving any sponsor hints this time because I'm pretty sure any hints would totally give it away. In the email I received from the August sponsor I was told that "it will be a great prize that anyone would be happy to win!" and believe me, knowing exactly what the giveaway is...wowza! Let's just say they are being very generous! AND since this will be the first Sketch Week following CHA the giveaway is their newest products.

I'm looking forward to it! :)

Friday, July 9, 2010

Sketch Week, Part 5

The last layout of Sketch Week is one that you might not immediately notice that it's based off the sketch and it's definitely the simplest version of the week.

The sketch that I'm using, from our DVD - Stretch Your Scrapbooking, as a starting point for all five layouts this week.


Layout #5 - "Balloon Boy"


Supply list - Cardstock and border strip: Bazzill; Patterned paper: My Mind's Eye, KI Memories, Crate Paper, and Fancy Pants; Alphabets: American Crafts; Word stickers: Creative Imaginations and Making Memories; Chipboard circle: Scenic Route

Variation #1 - The photos are probably the biggest variation from the sketch on this layout. I had so many pictures of Drew and the balloons that I want to include on the layout and most of them were ones that I didn't want to crop down.

On the right page I used two 4 x 6 photos. On the sketch it shows the 4 x 6 photo placed just above the striped strip but since I wanted to include two I moved one down to leave room for the one above it. This way I had plenty of room for two photos and the title. The photos still has the same 6" width as suggested on the sketch but the height went from 4" to 8"

On the left page I varied quite far from the sketch, kind of. I kept two of the 4 x 4 photos but substituted two 4x 6 photos for the other suggest 4 x 4 photos. I still kept the 8" width of the photo group but the height moved up to 10".

Overall, I extended the height of the photo layout of the sketch while keeping the same width as suggested. I think there are always ways to add more or substitute larger photos on a sketch. This was an easy way to add more (3 more!) 4 x 6 photos.

Variation #2 - Rounded corners are a great and easy way to change the look of a sketch. I rounded the corners on all of the photos on my layout.

Variation #3 - Since I extended the height of the photo areas it would have been almost pointless for me to add the large background circle on the sketch. The pictures would have ended up covering most of it plus I didn't want the colors on this page to end up being too much. Remember the other day when I talked about how you have to be careful with what paper you use for the big circle? Well, this falls into that same category. The pictures and the balloons are so colorful that I was afraid adding in too much more would have made the layout overwhelming with bright colors. This way the photos really stand out on the plain cardstock.

Variation #4 - I also changed the striped strip and the scallop strip to fit the extra photos and to make more room for my balloons on the left page. I went with a smaller width of the stripe and then added a border strip on top of it instead of below it. I knew that if I did the suggested 2" striped strip my balloon strings would have to overlap onto it and most likely would have gotten lost in the stripe pattern.

Variation #5 - So lets say you want to save some time when using this sketch or maybe you have zero desire to add that many circles, this is probably the easiest solution. Try using a large embellishment in place of all those circles. It just so happened, not exactly planned that way, that my big embellishment ended up being made of circles, but you could use anything. A big flourish, a tree, a house, anything that is big and will cover, roughly, the same area as the circles on the sketch do.


I used different patterned papers to make the circles, added little triangles to the bottoms, and then stitched the little strings. For a few of the balloons I layered three different sized circles and used foam adhesive to give them some dimension. (You can read this post to learn a little bit more about how to make embellishments similar to these.) I also added some Stickles and word stickers to a few balloons for a finishing touch.

On the right page I added one lone balloon in place of the circles.


Variation #6 - Instead of writing my journaling directly on the page I used journaling strips. Mainly my reason for using strips was to cover up a lot of empty space in the 4 x 4 photo beside the journaling area. It was so distracting and with journaling strips I could cover some of it up.

Today is the last chance for the giveaways! Be sure to check back on Monday to see if you've won either the Pink Paislee package or the copy of Sketches for Scrapbooking. I'll also be posting the date for August Sketch Week.

Have a great weekend! :)

Wednesday, July 7, 2010

Sketch Week, Part 4

The purpose of today's layout is to show you how to very easily adapt this sketch to fit a specific theme.

The sketch that I'm using, from our DVD - Stretch Your Scrapbooking, as a starting point for all five layouts this week.


Layout #4 - "Arnall Tradition"


Supply list - Cardstock: Bazzill; Patterned paper, stickers, and alphabet stickers: Pink Paislee

The 4th of July is not only one of my favorite holidays to enjoy but it's also one of my favorites to scrapbook! On this layout I used the same collection from the Pink Paislee giveaway.

Variation #1 - Since I was making a 4th of July layout I thought stars would be a great substitution for the circles. While the circles would have looked great too, the stars just fit the specific theme so well. Just think of all the different elements you could use in place of those circles: hearts, arrows, flowers, flourishes, squares, trees, etc.


Another thing I want to point out is the difference of the circles, or stars on this layout, grouped together. Don't stress yourself out trying to get the exact shape of the circle groups on the sketch or even the same size. As long as you've got the elements in that general area it's going to look great. If you go back and look at all the layouts I've posted this week not one looks the same as the others as far as the circle placement goes. I always lay mine out before I adhere them to get an idea of what it's going to look like. Plus it's easier to add one here, take one out there if they aren't glued down. Once you've got them in a place you like and are happy with the results then start adhering them.

Variation #2 - I kept the same 2" striped strip that the sketch suggests but I want to tone down the boldness of it just a little bit. I was able to do this by adding another patterned paper strip in a lighter color over the top of it and leaving only 1/4" of the stripe showing above and below it.

Variation #3 - Yesterday I talked about my frustration with border strips and only getting one in the package. Well, on this layout I copied a border strip that I liked by making it with patterned papers. In place of the scallop strip on the sketch I instead used circles and stars punched out of patterned papers and added them across the page. Of course it took a little longer than just adhering a sticker but this way I was able to stretch the complete design all the way across both pages.

Variation #4 - Last week I posted a 4th of July layout with the photos arranged in a grid. I love how grid designs are an easy way to get a lot of photos on the page. I somewhat followed that same pattern here. I always have so many pictures from the 4th that it's so hard for me to narrow my choice down to just a few. By cropping my photos into smaller sizes I was able to include a lot of little details of that day on my layout.


I still kept the same measurements as the four 4 x 4 photo group suggested on the sketch but instead used smaller photos to fill that space.

Variation #5 - And the last one, a small one, I used a simple journaling block instead of having my journaling directly one the page. I know I probably sound like a broken record, but I can't repeat it enough, the journaling section of the layout is always one that can be altered to fit the length of your story.

Two more days for a chance at winning the Pink Paislee giveaway or the Sketches for Scrapbooking giveaway. :)

Sketch Week, Part 3

Today's layout, I think, falls somewhere in between my type of simple and extreme. That's sounds kind of crazy since simple and extreme aren't words that typically go together. Maybe you'll see what I'm talking about and then it won't sound so insane.

The sketch that I'm using, from our DVD - Stretch Your Scrapbooking, as a starting point for all five layouts this week.


Layout #3 - "The Word Nerd"
(I think I proved my inner nerd with that silly title!)


Supply list - Cardstock: Bazzill, Patterned paper: BasicGrey and Graphic 45; Typewriter key alphabet: Tim Holtz, Alphabets: American Crafts and Making Memories; Journaling note pad: Jenni Bowlin; Chipboard alphabet: Tattered Angels

I think the simplicity of the layout mostly comes from the colors and the extreme is definitely the choice of elements.

Variation #1 - So far this week the layouts I've shown you followed the sketch by using circles. For this one I mixed it up a little and used a combination of circles and letters. Actually I had originally planned on using just letters but I happened to stumble across a set of chipboard letters that included a letter within a circle. Perfect! I ended up using the whole alphabet across the layout and boy was that a puzzle to figure out! I didn't want to overlap the letters too much like some of the circles on the sketch since I wanted each letter to show.


Here are some other ideas for using the whole alphabet on a page:

• The ABCs of ___________ (fill in the blank)
• Have your child write out the letters for a page about them learning the alphabet or learning to write their name.
• For layouts with pictures of kids reading or being read to.
• First day of school or really lots of different school layouts.

Variation #2 - On the left page I used two photos in place of the 4 x 6. They both have the 4" height and together they have the 6" width. I also left off one of the 4 x 4 photos on the right page to make room for more journaling, which leads me to the next variation...

Variation #3 - I knew that the story of my nerdy writing history was going to be too big for the suggested space that the sketch provided. My solution was to remove the bottom 4 x 4 photo so I could have ample space for the story.

Something a little different I did with my journaling space was using multiple journaling note cards. I have so many little journaling note pads that I love but it almost always seems that they are a little too small for what I have to say. Luckily, the journaling note card I wanted to use came with several of the exact same one. I layered three of the same journaling note cards on top of each other to give myself a lot more space. I love that I had plenty of room to tell the story and it also ended up looking kind of cool.


I also used tiny letter stickers to highlight some of the words in my journaling. The reason for this little addition? I misspelled a word while writing in pen and didn't have anymore of the journaling cards. Mistakes happen and sometimes that's when you really need the creativity. (I have another story along these lines involving a smashed gnat and a button.) The little letters stickers ended up being the perfect size for covering up my mistake.

Variation #4 - In place of the scallop strip suggested on the sketch this time I used several different border stickers. One thing, as a two-page scrapbooker, that can kind of frustrate me is that most of the time border stickers only come with one of each piece and sometimes I'm wanting two to stretch across my whole layout. Of course this never stops me from buying them! I loved these border stickers and was determined to use them on this layout. I finally decided to layer a variety of them in different styles and sizes and this way I was able to use them across the whole page and I used up almost the whole sheet of stickers.

Third chance for the giveaways starts today! :)

Tuesday, July 6, 2010

Sketch Week, Part 2

Today's layout is a simple approach to the sketch. Keep in mind that I'm not really a simple scrapbooker so it's more like simple the Allison way. :)

The sketch that I'm using, from our DVD - Stretch Your Scrapbooking, as a starting point for all five layouts this week.


Layout #2 - "Lovable, Sweet Chewy"


Supply list - Cardstock and border strip: Bazzill; Patterned paper, chipboard, and stickers: BasicGrey; Alphabet: American Crafts, Pink Paislee

Variation #1 - I wanted to show a layout this week with a much faster, easier, and more simple way to do the circles. Instead of using a bunch of smaller circles I used a large circle for most of the area that the circles are on the sketch. Then I added a few smaller circles and some embellishments. This is a great option for those that wouldn't want to put the time into arranging all the smaller circles or if you think all the small circles on the sketch are too much. Using that larger circle takes up so much of the space that it only need a few accents to finish the look.


A super easy technique you can us to get the most out of your punches is to use the negative. I have this tiny dog paw print punch that I love but the individual pieces of the paw are so small that it would be hard to adhere the actual punched paw print. So, what I like to do is use the negative of the punch, the punched out paw print left on the paper. To make the little dog paw print circles I used a small dog paw print punch and punched it out of paper. Then I used a circle punch and punched around the dog paw print on the paper.

Variation #2 - On this layout I had two vertical pictures that I wanted to include on the layout but I didn't want them to be cropped down to 4 x 4 for the right page. That left me with using them on the left page in place of the 4 x 6. The good thing about this sketch is that it's easy to adjust to the amount of pictures you want to include. You can always use less circles to accommodate the pictures. In this case I placed the two pictures side by side and then arranged my circles like they are on the sketch, around the left edge of the photo. Doing this is what I like to call my "extend" technique. Extending a sketch is making it wider or longer by adding more photos or elements that you want to include.

Variation #3 - On my layout yesterday I showed you how it would look without the large circle on the background and the layout today shows what it would look like to use a different shape. I cut a 12 x 12 piece of patterned paper down to 11 x 11, rounded the corners, and added a hand stitched border around it. Die cut patterned papers of all shapes are a great idea to use there too.

One thing you might want to keep in mind with this sketch, when it comes to that background circle, be careful of what kind of paper you use. With the smaller circle accents the layout can become a little too busy if you don't use the right paper for that circle background piece. Chances are you would use a variety of colors for the circles accents and if you do the same with the background circle the whole overall look of the layout can get a little lost in all the colors or patterns. I'm not saying that you shouldn't use a multi-colored background, it's just something to watch for when using this sketch.

Day #2 = your second chance for the Pink Paislee and Sketches for Scrapbooking giveaway!

Sunday, July 4, 2010

Sketch Week, Part 1

A new month, a new sketch, five new layouts, and a new sponsor! It's bound to be a fun Sketch Week!

The sketch that I'm using, from our DVD - Stretch Your Scrapbooking, as a starting point for all five layouts this week.


This is one of my all time favorite sketches! At first glance it might be a little intimidating with all those circles but each day I'll show you how to adapt this one to your own style or theme. I'll try to cover everything, simple to extreme, and show you that this sketch can work for anyone. Most of the focus will be on those circles since they are one of the big eye catchers of the layout, but I think you'll also be surprised at how they don't overshadow the photos.

When we started doing sneak peeks of the DVD layouts I showed you this one that the sketch is based off of.


The circles add a fun touch but with the pictures being grouped in the middle they still take the stage as the center focus of the layout.

Layout #1 - "More Than Sisters"


Supply list - Cardstock: Bazzill; Patterned paper, die cuts, journaling block, border strips, folded fabric strips, alphabets and cork circles: Pink Paislee.

Variation #1 - I love the big background circle on the sketch but I wanted to show on one of the layouts this week that the layout can look great without it. Not everyone has a circle cutter that cuts that big or a die cut patterned paper that matches the papers or pictures you are using. You can create a great looking layout without that big element on the page. Looking at a layout in layers, a lot of times the elements that are on the very first layer (the first applied to the cardstock base), can be removed and you still end up with a well designed layout.

Variation #2 - On the sketch there is a scallop border across the bottom of the striped strip. Anytime I see a decorative piece like that on a sketch I try to find a different decorative border each time I use that sketch. This is such an easy way to get a lot of milage out of one sketch. On this layout I used some Pink Paislee clear border stickers across the bottom. It's amazing how little things like that can change so much.

Variation #3 - One thing I love about the circles on the sketch is that there are so many possibilities. On this layout I did a mix of patterned paper circles, die cuts, cork circles, and pictures.


I know, trend-wise, that the days of cutting our pictures into shapes are long gone but I never been one to follow trends. I think cutting your pictures into shapes is just fine and there are ways to do it that can bring it up to date a little. I wanted to get a few more pictures on this layout so I took a circle punch, punched the pictures, and then added them among the circles. Adding the picture circles into the circle design of the layout makes sense and keeps the look up to date.


I also made flowers with the Pink Paislee folded fabric strips. To do this I started at one end of the strip, then layered the strip in a circular motion until I came to the end of the fabric strip, and adhered it in a few random places. It was so easy to make!

Variation #4 - On the sketch is shows the journaling on the background cardstock on the right page. I needed more space than what I had left after adding the circles so I used a journaling piece that is adhered over the strips going across the page. The journaling area is always a place that you can add more or use a little of to adapt to fit your layout.

So are you ready to find out who our July sponsor is? Some of you guessed right when you said, one of my absolute favorites, Pink Paislee! They have put together this awesome giveaway for one lucky person this week.


Not only did I use Pink Paislee today but I've got another layout later this week using their products.

There will be two different giveaways this week, the Pink Paislee giveaway and then the Sketches for Scrapbooking giveaway. I'll be posting everyday, Monday - Friday. All week you'll have a chance to leave a comment and next Monday I'll post the winners. You can leave more than one comment through the week to be eligible (five days = five chances to win!) but not on the same day.

Friday, July 2, 2010

Happy 4th of July (almost!) and the giveaway winner.

There is no doubt that the 4th of July is one of my favorite holidays. There's no normal holiday pressure like presents, costumes, or pretend characters. I love that's it's spending time with family, eating great food, watching the sky erupt in bright colors, and celebrating part of our country's history.


*as seen in the July 2008 issue of Creating Keepsakes magazine

I know this is an older layout but it's one of my favorites from my collection of 4th of July layouts. Mostly because of the amount of photos on it. Grids are an excellent way to get a lot of pictures on the layout and it's easy. I love that this layout shows so many little tidbits of the day.

Have a happy and safe 4th of July! :)

The winner of yesterday's Sketches for Scrapbooking, Volume 6 giveaway is...

Heather said...
Wow- Volume 6 congratulations. I can't wait to get my hands on a copy. And I agree that the spiral binding is wonderful, it is so nice when reference books lay flat.

Email me at alidavis1919@hotmail.com with your shipping information.

While I'm on the subject of giveaways, you might want to check some of my giveaways and see if you have won any. I've got a few that are unclaimed. I'll give 10 more days for someone to claim them.

Thank you so much for all the wonderful comments yesterday and celebrating our newest adventure with me.